Film Scanner

My long-awaited film scanner has finally made it to me. Thank goodness I never allow the lab to cut my negatives, since they have a difficult time printing them correctly. I like to do a lot of double exposures (as you all know…) and now I don’t have to rely on scanning in prints on my flatbed scanner.

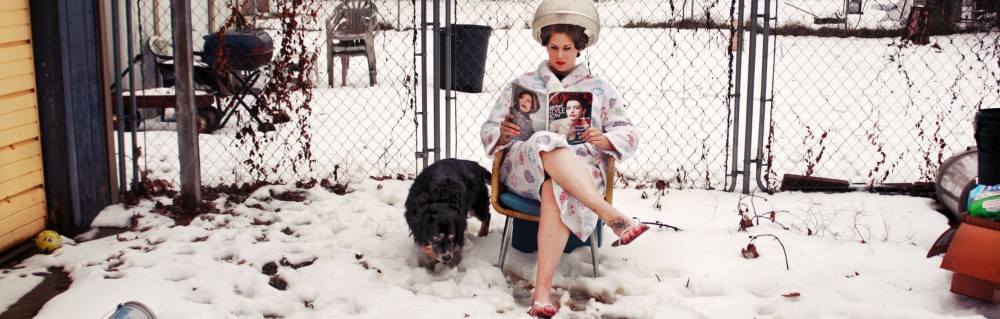
Here are some photos I took at the beginning of the semester, scanned in.

The scanner is another one of lomography’s products (I’m seriously starting to think I’m a sales-pitcher for these people… I just get their products a lot,) the Lomography Smartphone Scanner. It’s basically a little lightbox with a small hole where I can align the camera on my smartphone. They have an app that you use with it, where you can make the negatives positive, and you take the picture of it with your phone- that’s why they aren’t super high quality. One day I will be able to afford a nice scanner, but for now, this is it.

The first four images (the ones that aren’t in a blue cast,) I took around my campus near the start of the year. I posted two images before from the same roll, but those two were the only ones that the lab printed correctly. The Marching Band ones are blueish because I used an expired roll of film, and the app couldn’t correct the colors too well. Hopefully the app will improve over time.

I also really enjoy the sprocket holes… Not something you get to see every day.

That’s all for now, happy shooting!

My Experience with Lomochrome Purple XR

Lomography came out with this really cool special effects film last summer. The film kind of mimics the much loved and now coveted Kodak Aerochrome infrared film, only it’s not infrared. It has standard C-41 processing. Lomochrome Purple turns greens purple, yellows pink… This photo by BlazerMan on Flickr does a good job illustrating what this film does to color.

I bought five rolls of it, since you can only buy it in bulk at the moment. I was stingy and cautious with my first roll, one because it was expensive and two because no one has a set formula to get the most ideal results from this film. You can shoot anywhere from 100-400 ISO, but I’ve been some shots that are 50 and 800, and they look nice. It took me about a month to fill my roll, so it had three different shoots on it.

Image

This was my first shot with the film. Since the film’s effects show up best with foliage present, I thought my favorite view of the river on my campus would be perfect. I was not disappointed. I took this on my way to board the buses for a trip with the Marching Band.

I knew the school we were going to had a grass football field, and I was curious to see what results it would have. I shot these with an ISO of 200, and over exposed one stop. The colors are nice and rich, but a little too dark for my taste. I do enjoy the effect the film has on skin, though.

The film traveled with me on my adventure to the Packard Plant as well. I wanted to see what sort of results I would get without foliage present. It created an other-worldly effect, which was appropriate, considering my subject matter.

My last stop my film made was a cider mill/pumpkin patch. I over exposed by two stops for a couple, and those are the photos that have a pink haze.

I’m pleased with this film. I’ve used three rolls out of five. My second roll encountered a great mishap (my x700 was being a jerk and wouldn’t rewind the film, so I had to sit under a bunch of blankets to hand rewind it, wasn’t working, scissors, tears, snot, tissues… it was a total mess,) and my third roll will be showing up on this blog shortly, since it has a whole project attached to it that is worth seeing.

I recommend checking this film out and experimenting with different ISOs- it’s a lot of fun, and I like sharing fun things with you guys!